

To add a new table visit back office–> floorplan –> tables
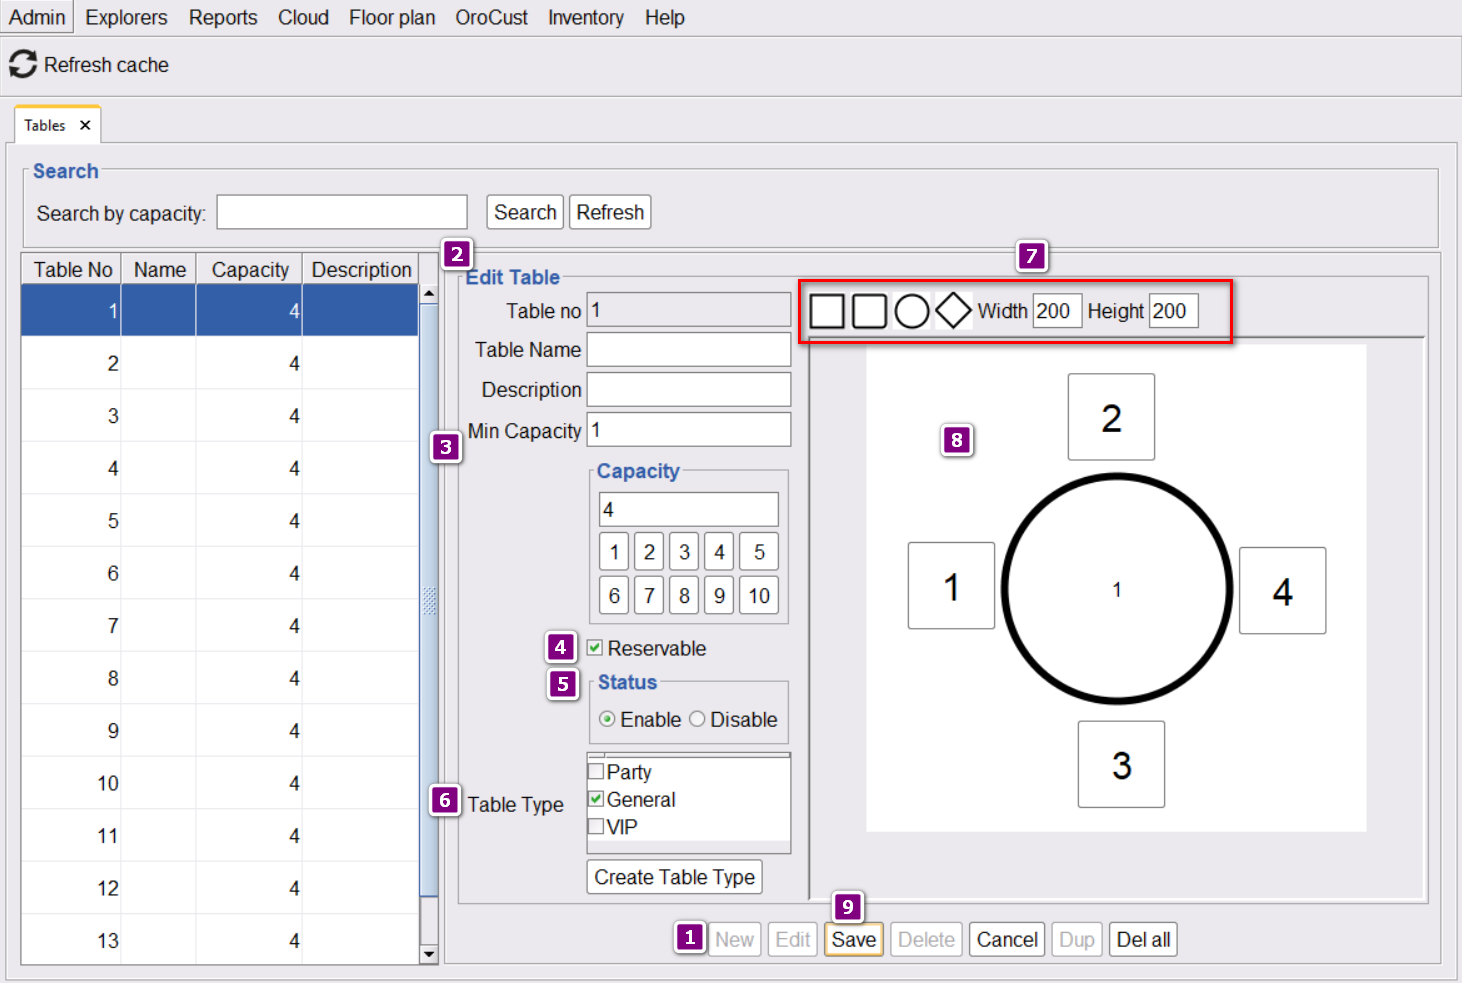
- Click on New to initiate the process.
- By default, the table number will be added. Depending on your requirements you can add a name and description to a table.
- Enter the minimum and the maximum capacity of a table. The minimum capacity should be greater than 0. And maximum capacity is depending on your requirements. For instance if your minimum capacity is 4, the system will not allow using that table if there are less then 4 guests on that table. And the same thing goes with the maximum capacity. If maximum capacity is 6, the system will not allow more than 6 guests in that table.
- If you want to make that table reserved for any future occasion, check this button.
- Enable the table.
- Select table type. If you don’t have any table type, you can create a table type here. This is not mandatory.
- Select your table’s shape and change its height and width if necessary.
- You can drag and drop your seats to anywhere you like.
- Finally, save your table
Please note that this Table shape is shown in Seat based order. To optimize speed, we show a table as a button in the Floor layout.