
There are different types of void functionalities in ORO POS.
- To void an item.
- To void a transaction.
- To void a ticket.
?When an item is voided, the total ticket amount changes and the customer should get a refund for the item price. On the other hand, if a transaction is voided the total price of the ticket does not change. In this case, the voided amount becomes due and the customer can pay again. Voiding a ticket is applicable only to unpaid tickets. However, in some situations, a store can void all transactions and then void the ticket.
Void an Item
This is also known as “Deleting Item” from a ticket. To void an item
- Go to orders from the main page
- Select closed ticket and edit.
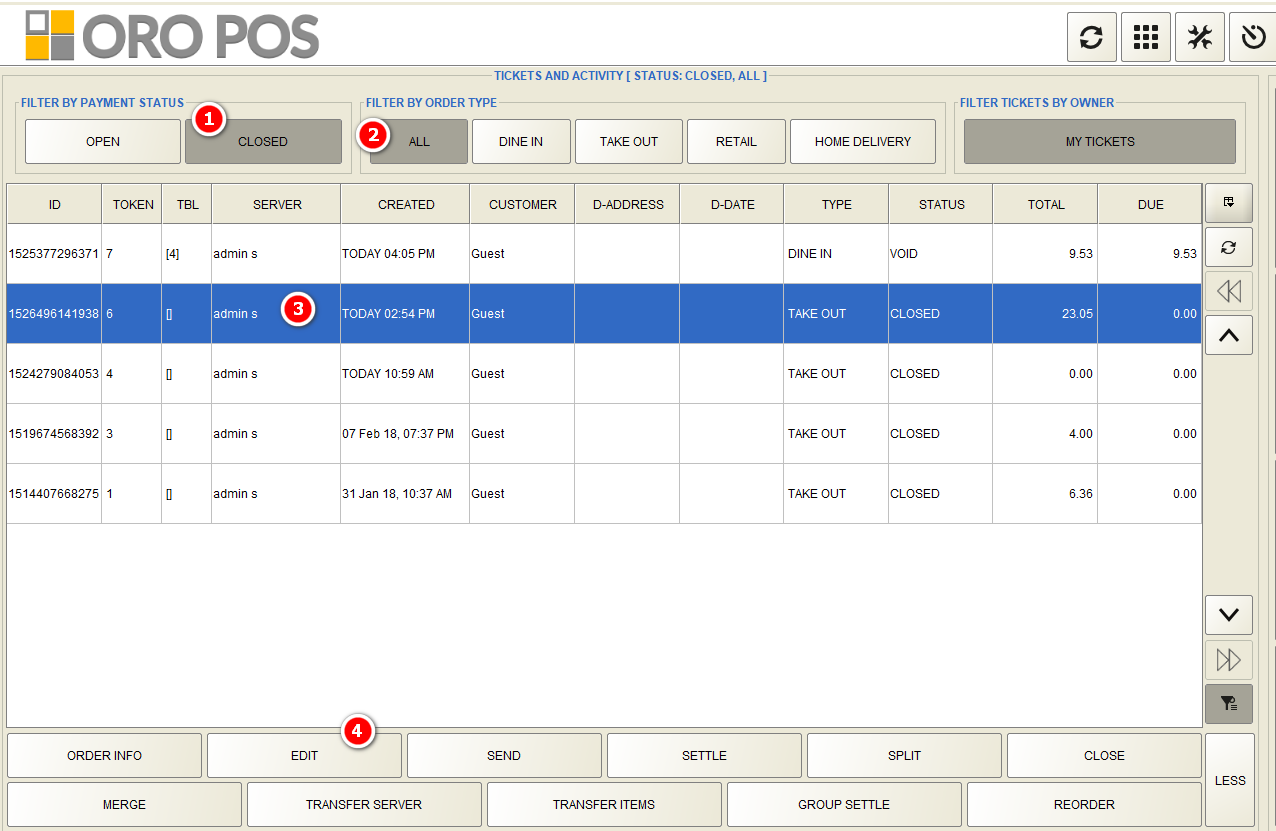
- Select the payment status. find the ticket in closed order tab.

- Choose order type.
- Choose the ticket.
- Press edit.
In edit screen, follow the steps
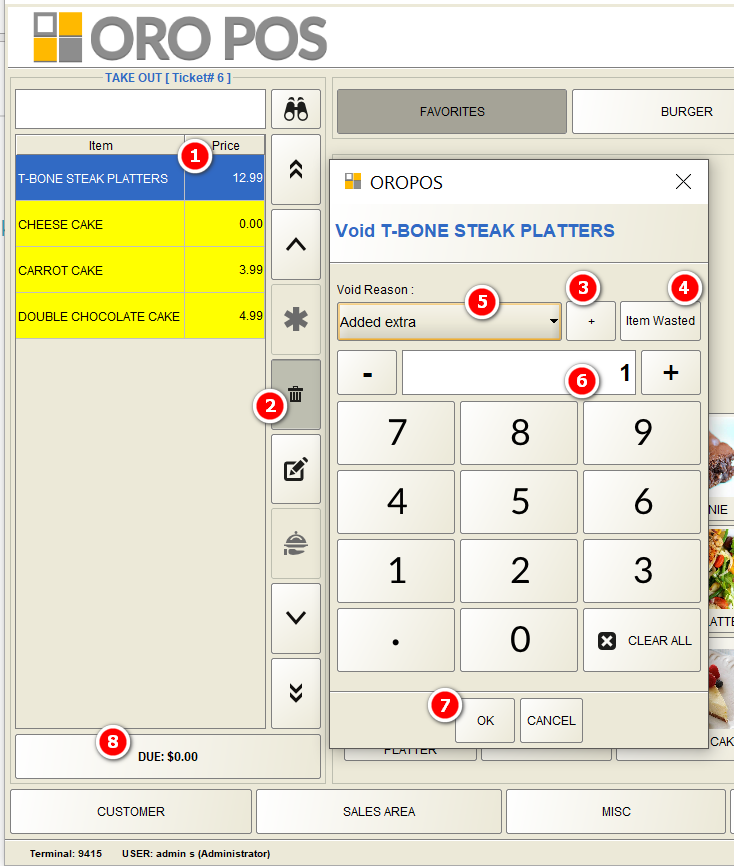
- Select the menu item.
- Press the delete button.
- Add a reason by tapping on “+” sign.

- If you don’t wanna write a reason, you can use the default reason “Item Wasted”.
- Can choose the reason from the drop-down list. If added previously.
- Select the item quantity. If there was 2 item of the same kind needs to be voided, choose to write 2.
- Press ok.
- Finally pressing due, go to order-taking-screen.
Now in Settle screen follow the steps
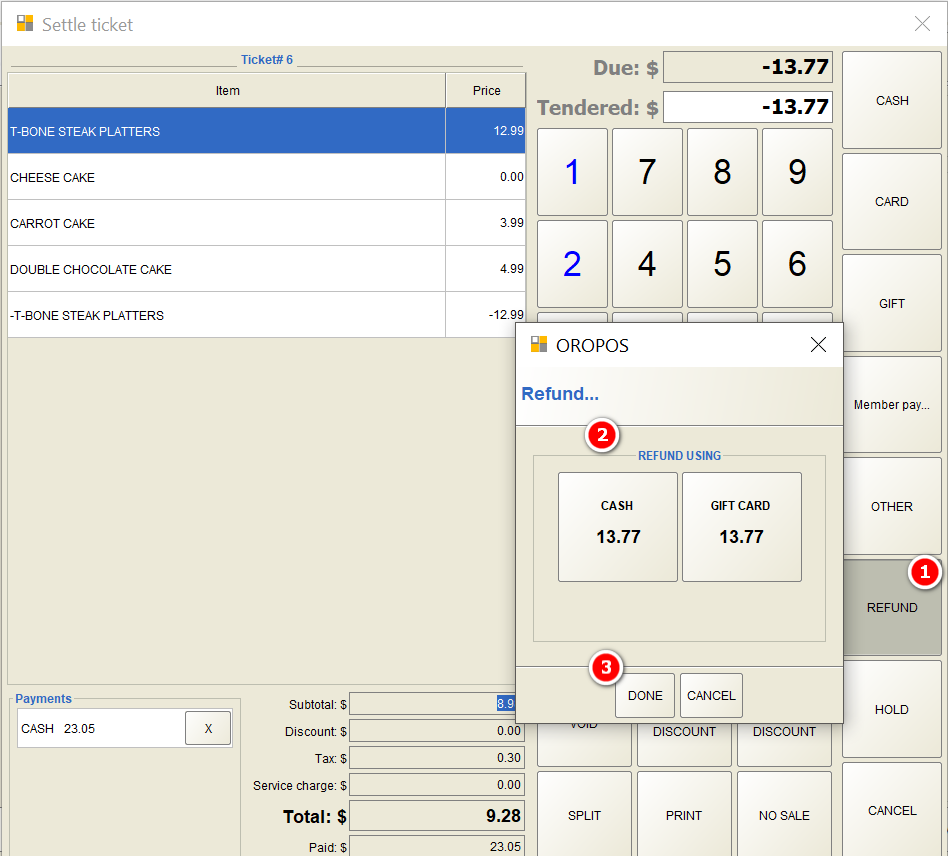
- Press refund to give the money back to the customer if any.
- Select the payment type you want to process refund with. Credit card refunds are only available if a customer paid with a card.
- If a customer uses cash to pay this ticket before, it will show both cash and gift card options.
- Press Done.
? After pressing refund, it may ask for the privileged password. Permission can be changed from the back office–>admin–>user type.
Void a Transaction
Sometimes there could be a scenario like, when a customer pays money in a card but wants to pay fully in cash or vice versa, the transaction needs to be voided first and then retake the payment again.
To do this, after following the 1st picture,
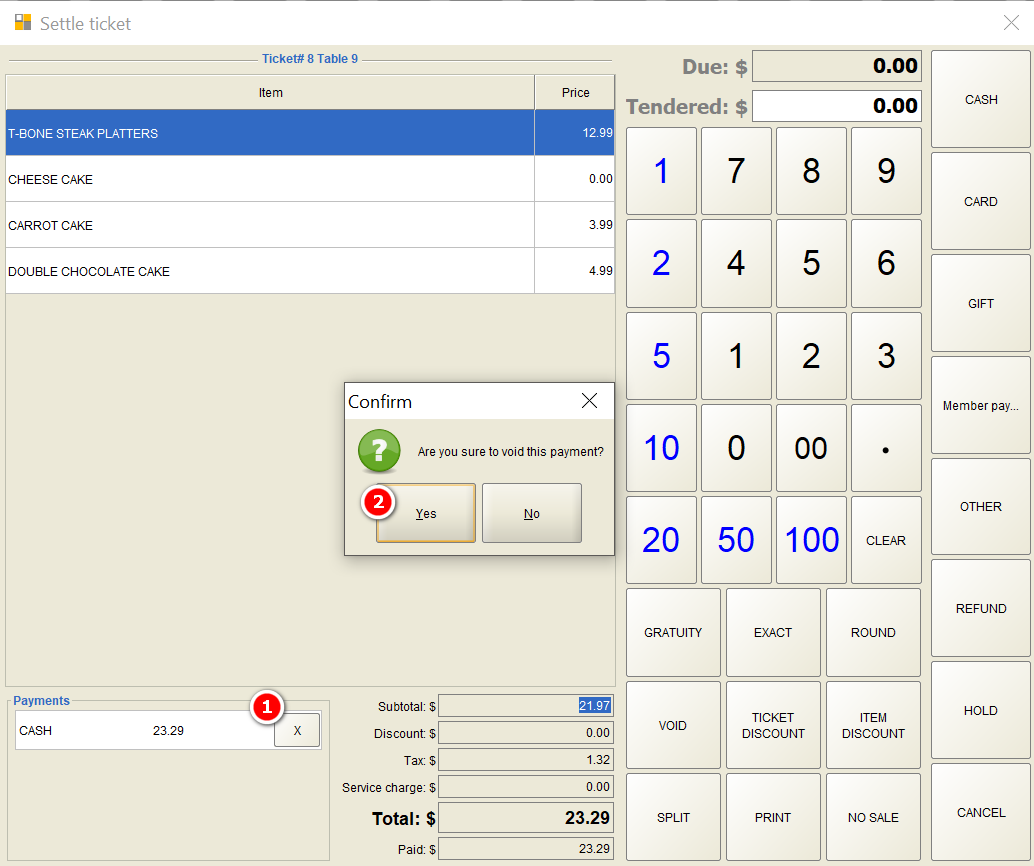
- Press that “X” button to delete the transaction.
- Press yes.
After voiding this transaction, take the payment again in any other payment type.
? Please note in the Retail environment, Void and Return are often used in the same way. If a T-Shirt is ordered and then customer returned it, it’s the same as voiding the sale for 1 T-Shirt.
Void a Ticket
To void a ticket fully, One need to
- Void all transaction
- Void the ticket.
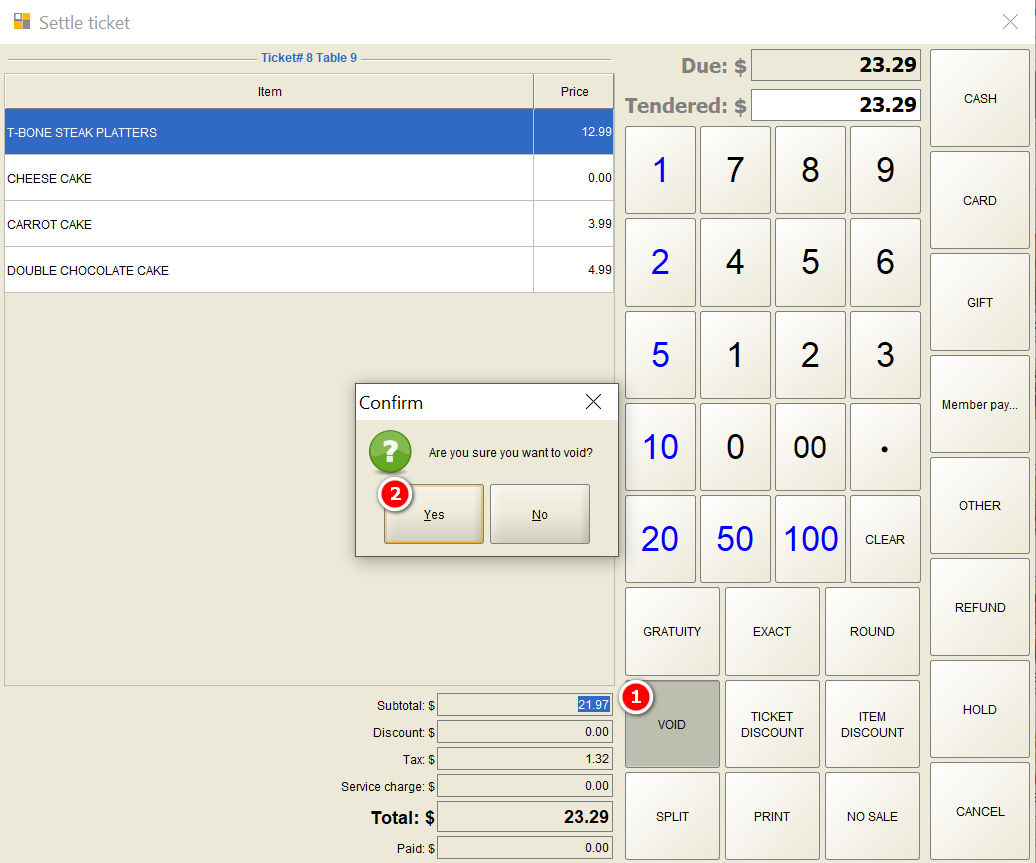
Pressing (1) will Void the ticket completely.
? Please Note, only authorized user can perform the void operation. After pressing void, it will ask for the privileged password. Permission can be changed from the back office–>admin–>user type.
Void in reports
The store may need to see a list of Void operations to track any suspicious incidents. They are two main reports where voids can be tracked.
- Void Item report
- Void & waste amount in Drawer / Store Report.
To check void item report, just go to back-office–>reports–> void items
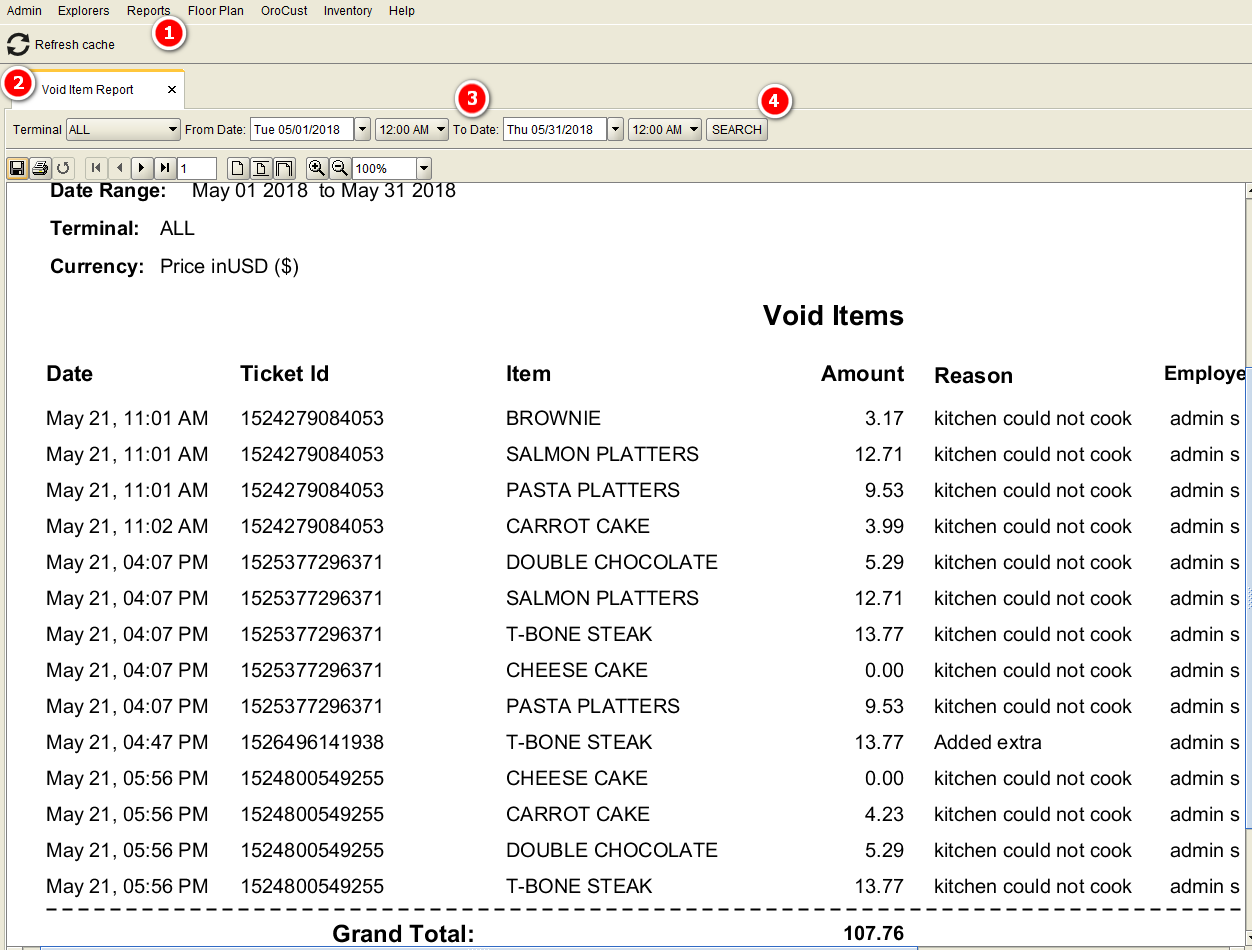
- Reports.
- Void item report.
- Select the date and time range.
- Search.
To check the void waste amount go to store status from clock in users and follow the instructions.

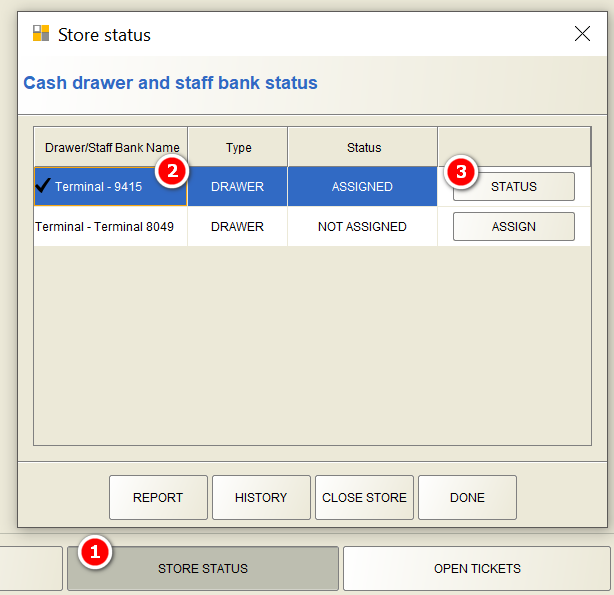
- Store Status.
- Select the terminal.
- Click on status to check the report.
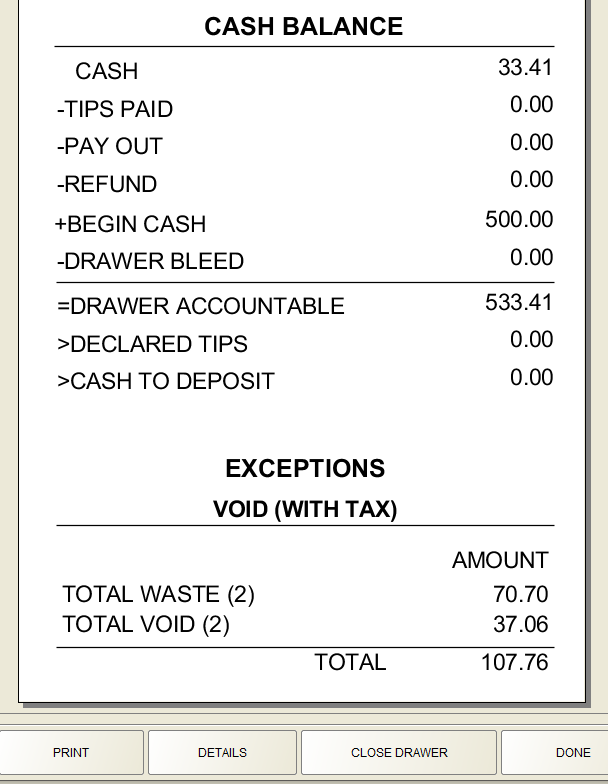
Now in this void report, it will show the total voided or wasted.
Voiding Items sent to the kitchen ( yellow marked) should be Wastage.