
ORO POS allows setting up meal courses. To set up course based meals, follow the instructions below:
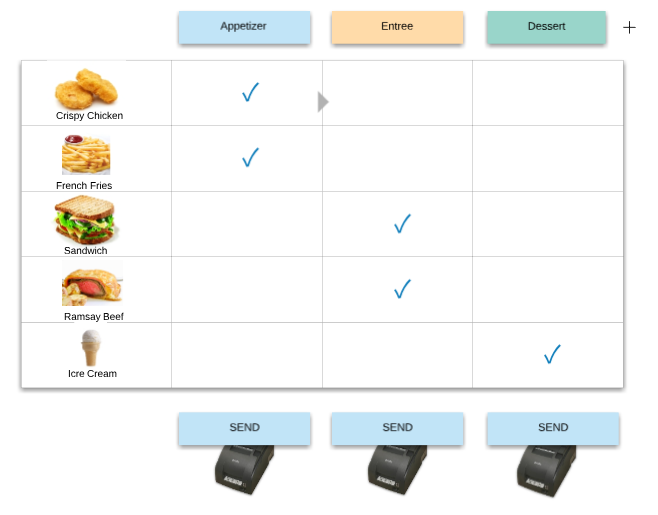
Figure: Meal course overview.
Go to back office–> Explorers –> course–> set up courses.
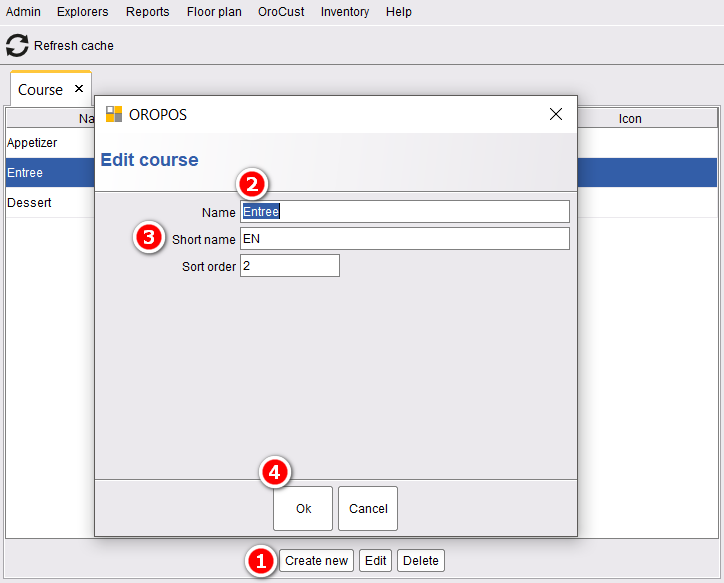
Figure: Creating courses.
Then, from back office–> order type–> edit the order type where you want to have course based meal –>select enable course based order -_>press ok to save and restart the POS.
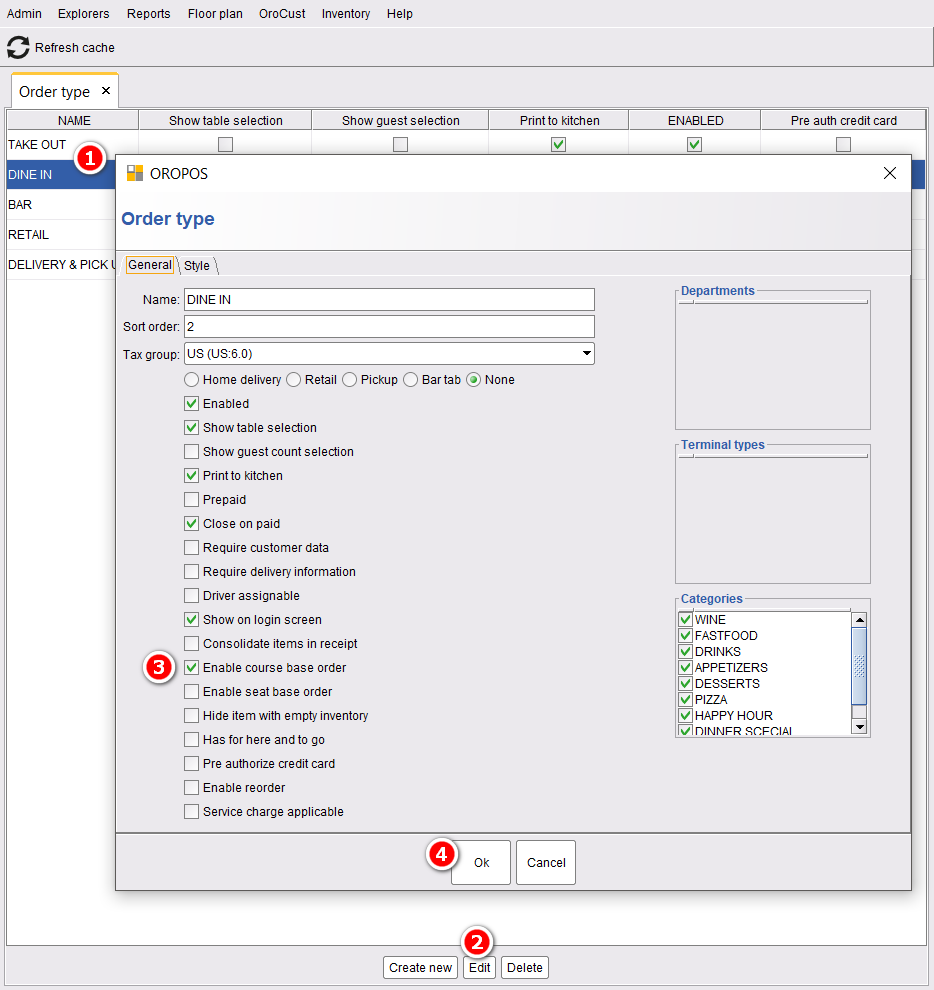
Figure: Enabling course based order.
Then, select the courses for each menu items. Go to back office–> explorers–> select an item–>edit–> select the course–> press ok to save.
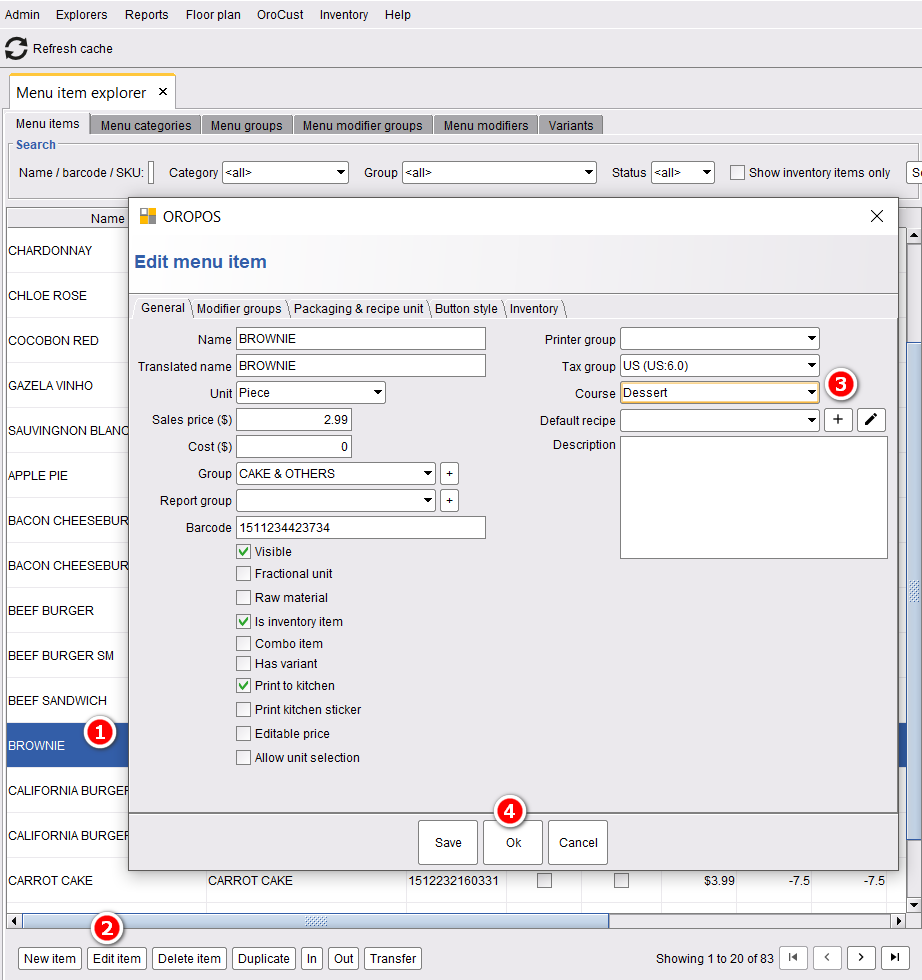
Figure: Selecting a course for menu items.
Even if you don’t select your menu items based on courses after you take an order all the menu items will come under one course. And by pressing organize course, you can drag and drop your items between courses. You can also send the menu items to the kitchen based on their courses serially.
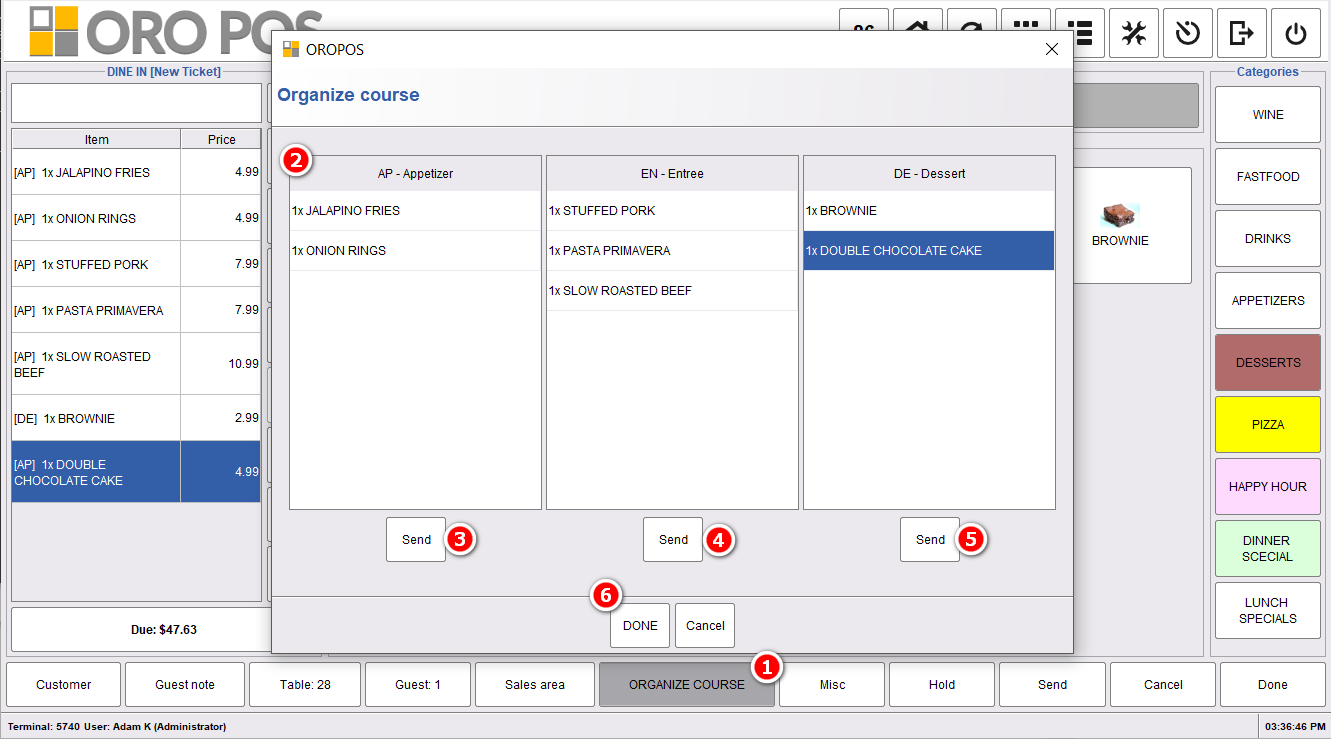
Figure: Organize menu items in courses.
At first, the server will press send button for the Appetizer course. If the print to the kitchen is successful, the appetizer menu items will become deep yellow. All the remaining menu items will remain light yellow. When the server needs to send the Entree, he will log in and proceed in the same way.
Figure: Sending the first course to the kitchen.
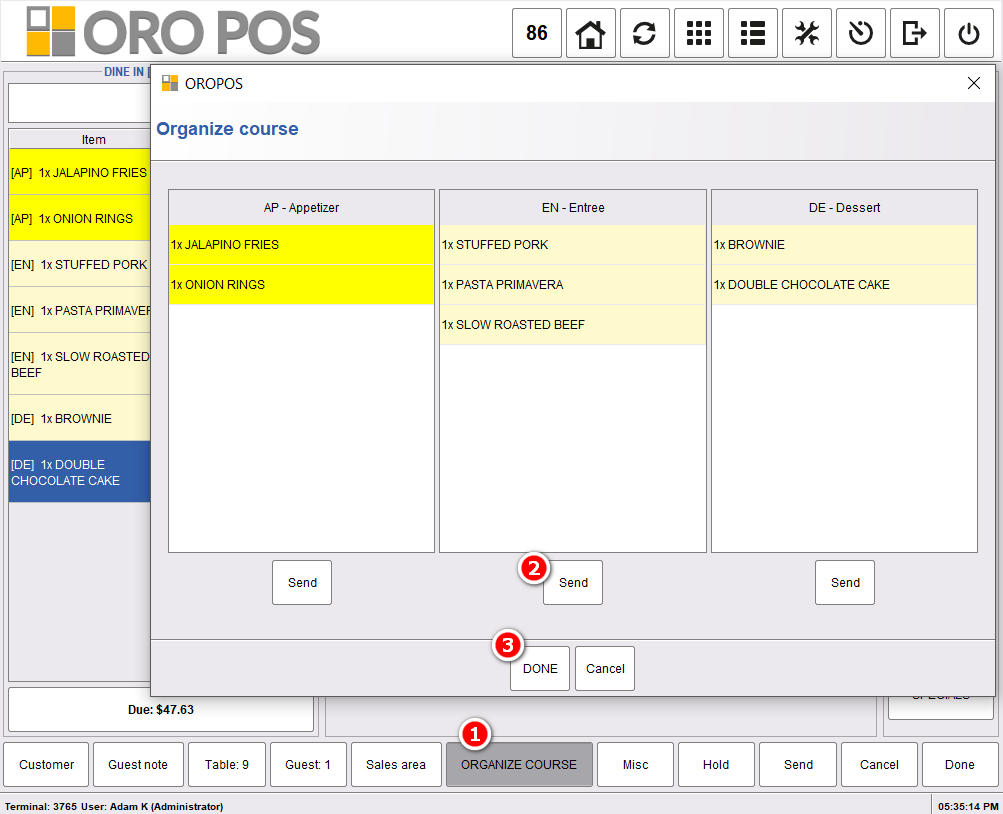
Figure: Sending remaining courses to the kitchen.