
Stores require custom payments options for the following situations,
- Taking Credit Cards using stand-alone external Credit Card terminal and still want to check the reports in ORO POS.
- Outside of the USA where we don’t offer integrated credit card support.
- In case of a power outage.
- Track online and 3rd party food delivery transactions like Grabhub & Uber Eats.
Adding custom payments buttons and checking its report requires 4 steps.
- Add new custom payment buttons.
- Make your custom payments button visible to the ticket settle screen.
- Take orders using custom payment buttons.
- Check reports.
Add new custom payment buttons
Visit back-office–> admin–> custom payment–> new
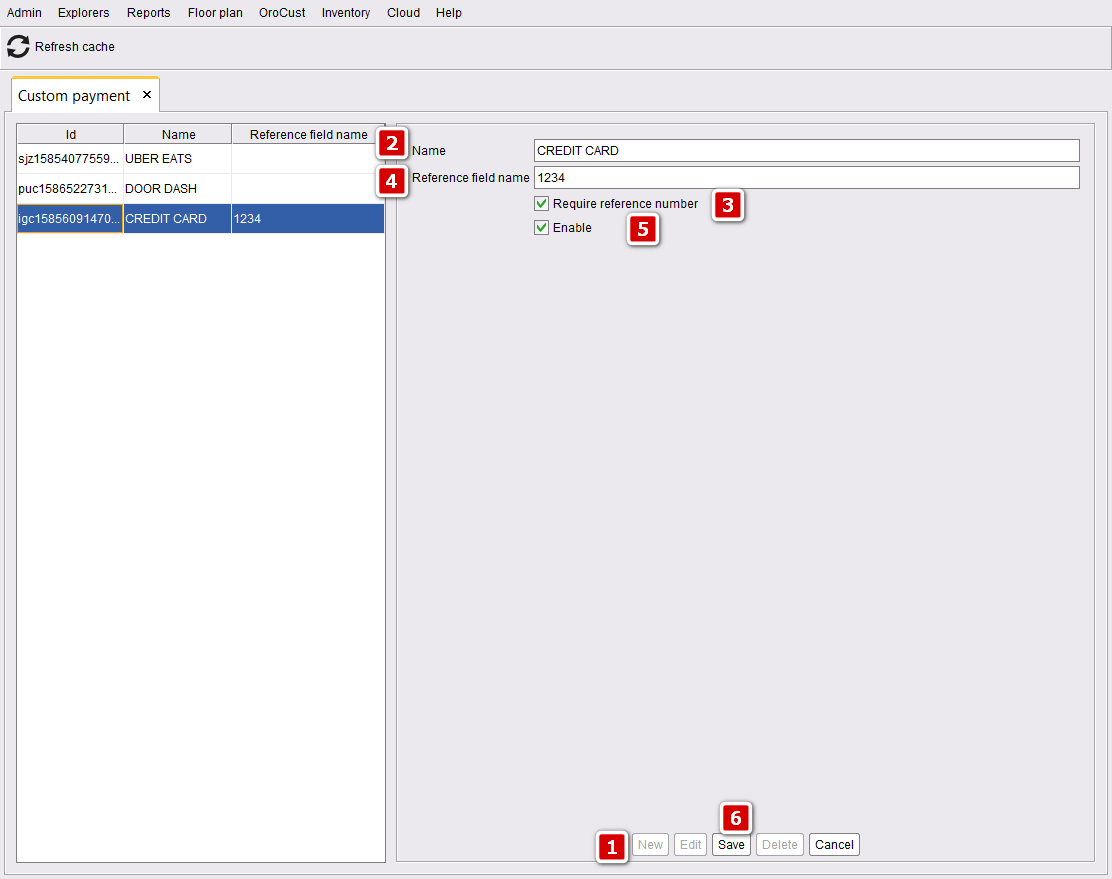
- Click on new to add a new custom payment button.
- Name your custom payment button.
- If you want to receive orders using reference number select this option.
- Enter your reference number.
- Enable the button.
- Save your changes.
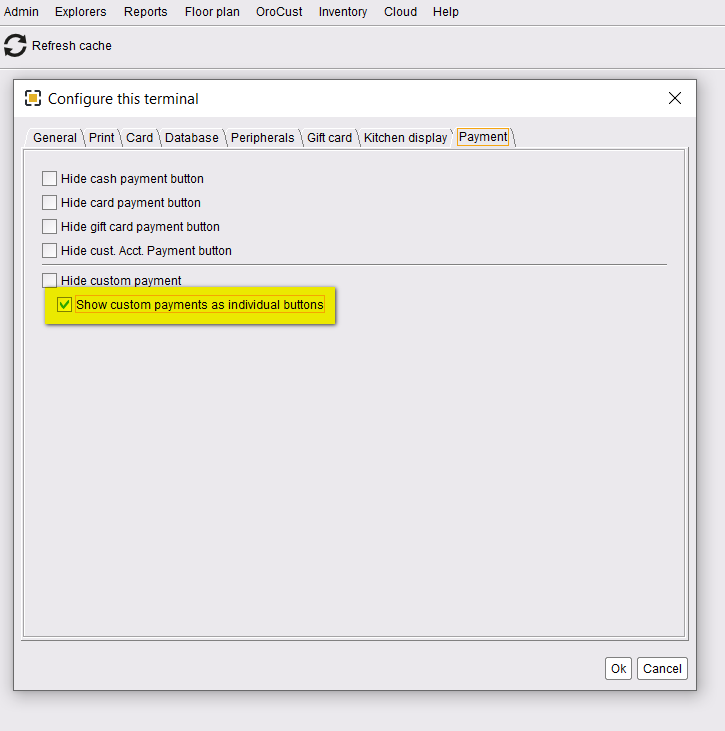
Make your custom payments button visible to the ticket settle screen
Visit back-office–> admin–> terminal configuration–> payment–> select show custom payments button as individual buttons
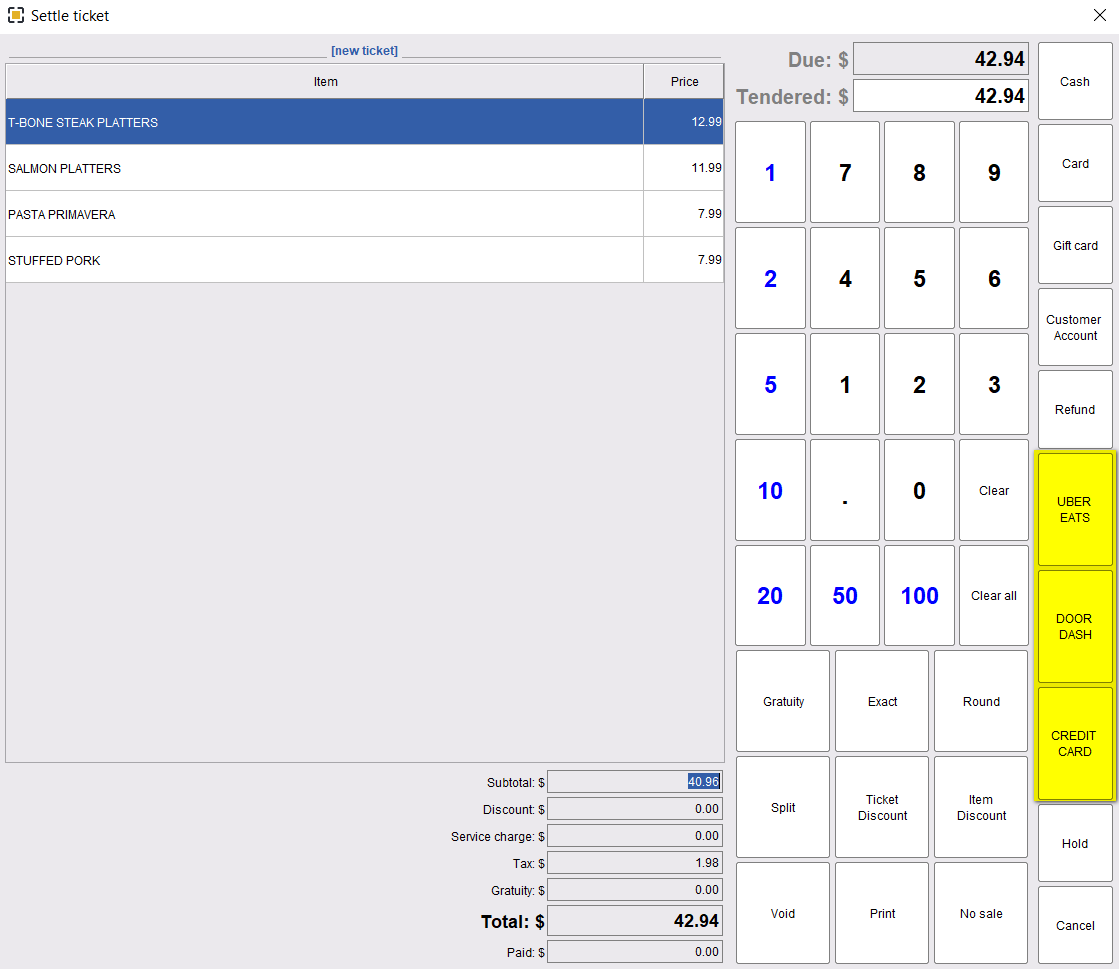
Take orders using custom payment buttons
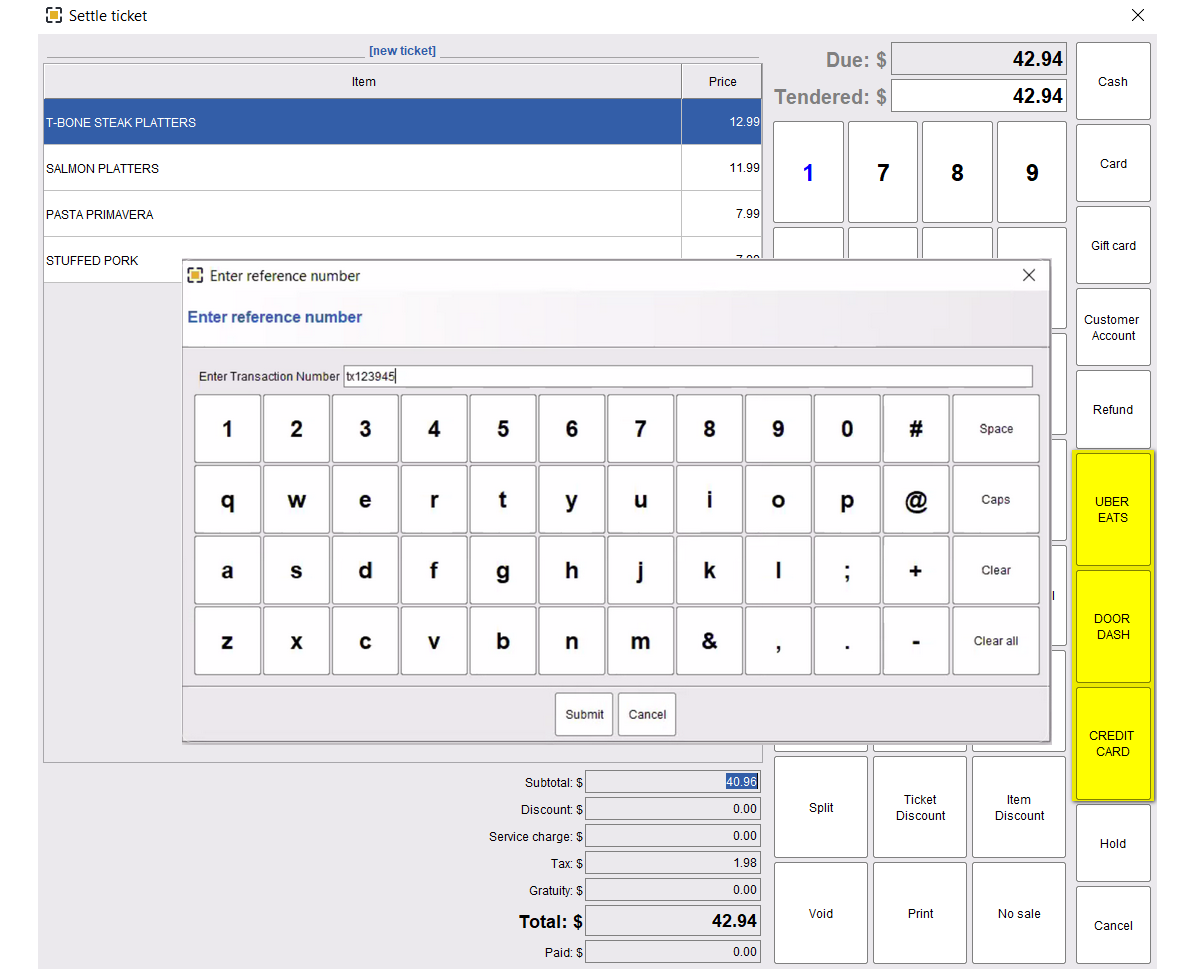
Just take an order from any order type like Dine-In, Take-Out, Bar, etc, and pay using the custom payment buttons. If you entered a reference number in the custom payment button, the system will ask for the reference number every time you select that custom payment button.
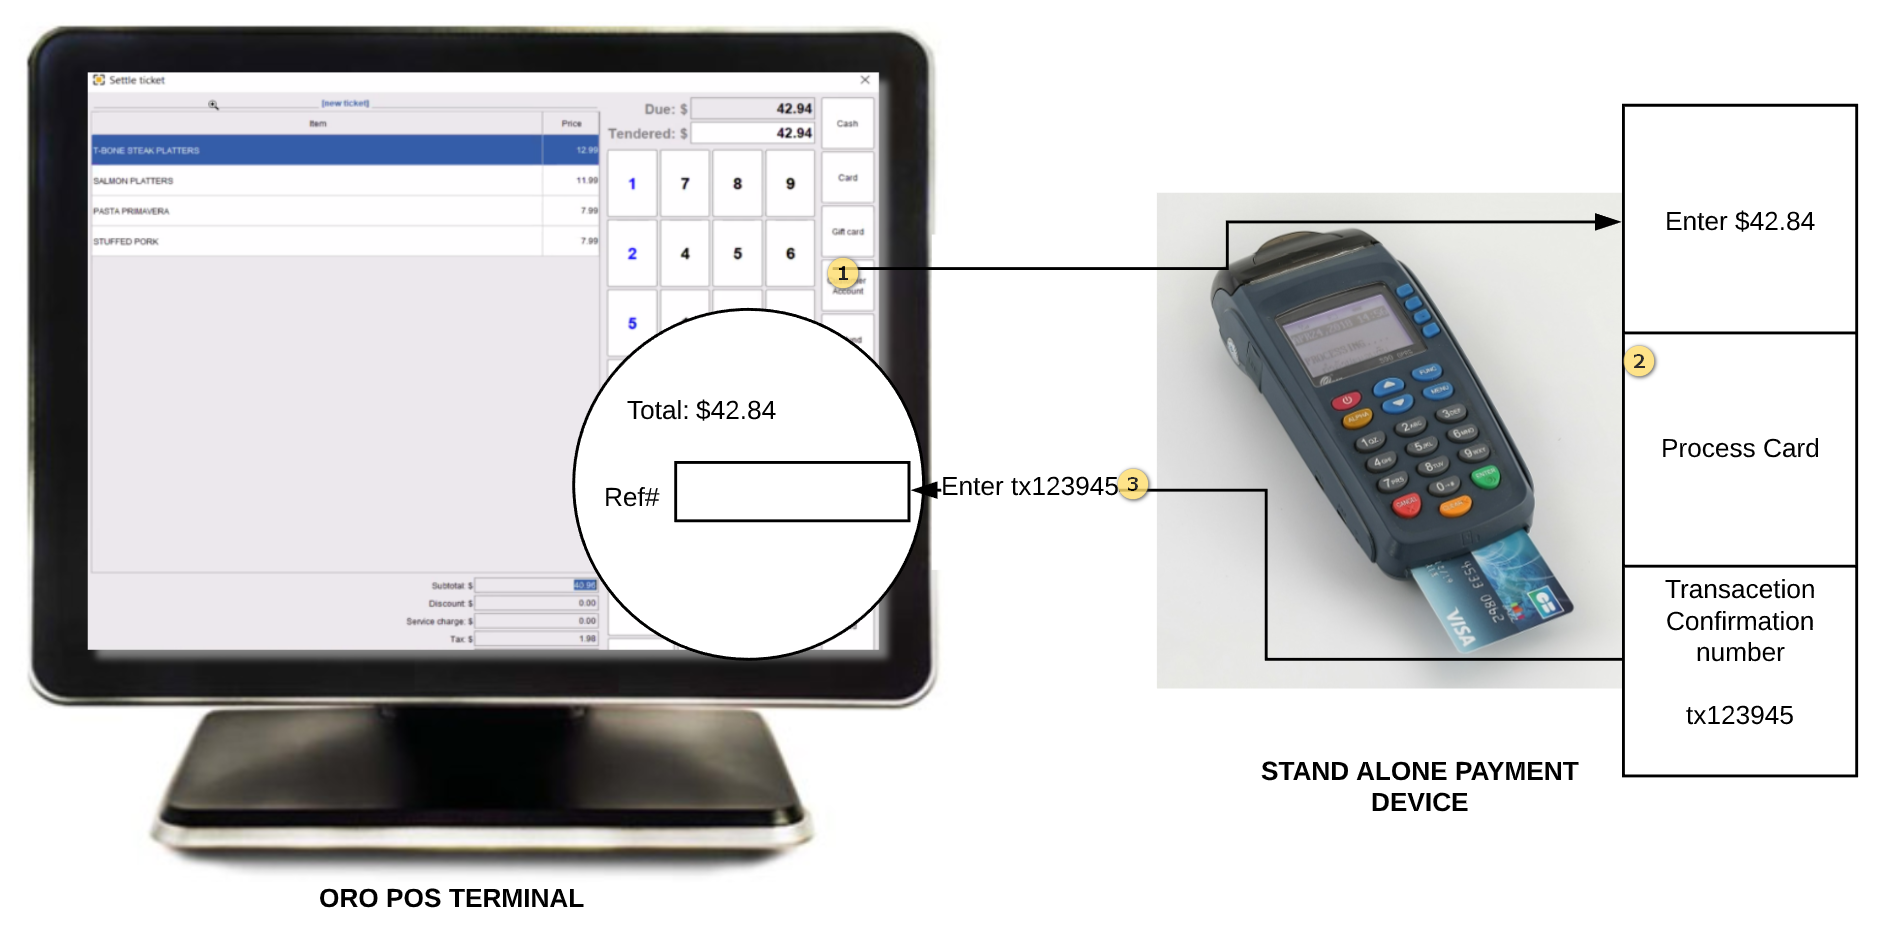
Recording Payments in Stand-Alone Card Terminals
Stores may use stand-alone credit card terminals using custom payment.
- Click on your custom payment button.
- Go to your stand-alone terminal and manually enter the total amount and process card.
- Go back to the POS terminal and enter the confirmation number in the reference field.
Custom Payment Report
Visit back-office–> reports–> card & custom payments report–> search the report datewise.
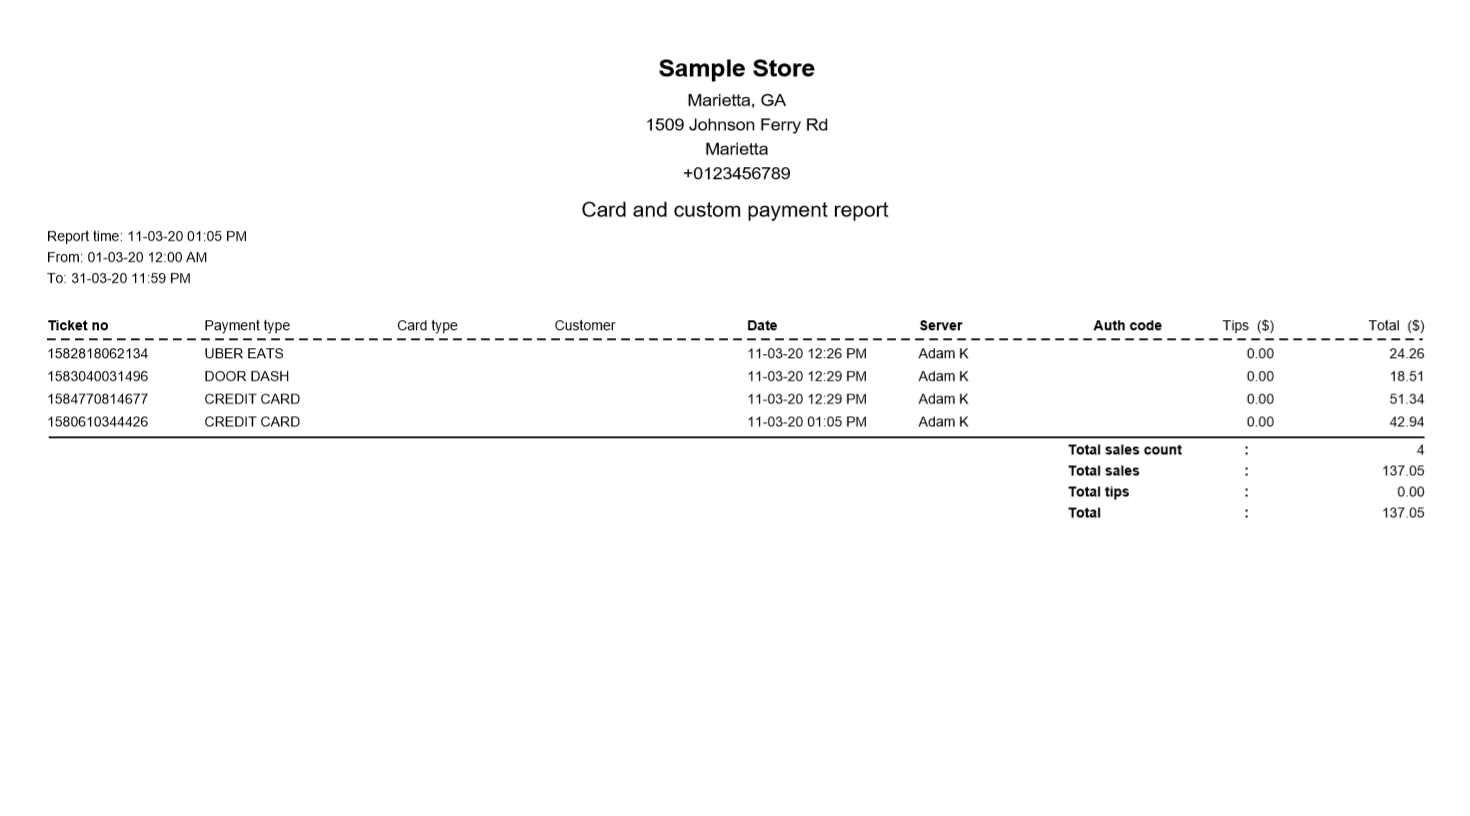
Unlike integrated credit card system, custom payments doesn’t have any security of capturing customer data. It is just like a payment button like Cash.