
In ORO POS setting up tax has the following steps

Setup Taxes
login to back office–>admin–>tax–>taxes–>add new tax with the rate percentage
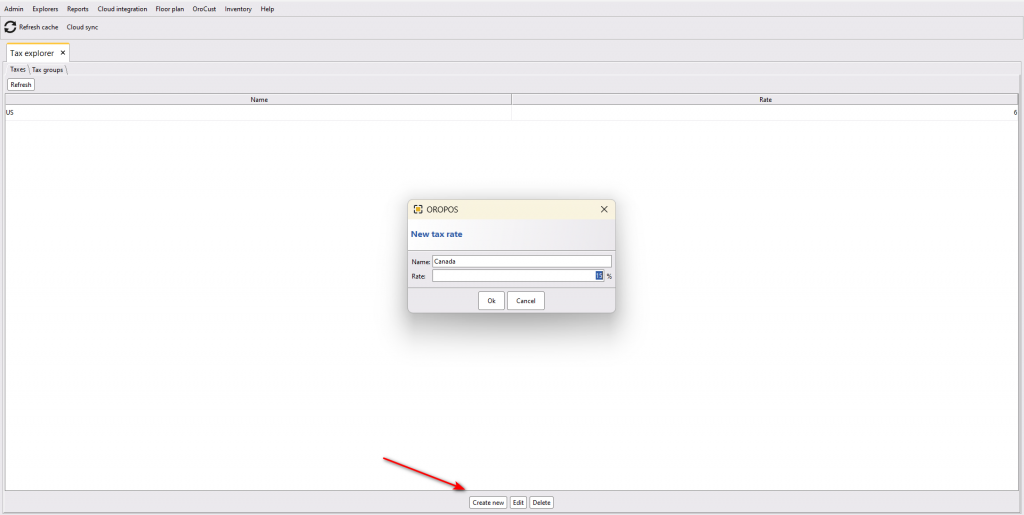
Creating new taxes
Setup Tax Groups
Next, create a new tax group and choose the taxes for this tax group
back office–>admin–>tax–>tax groups–>create new tax group and add taxes for it.
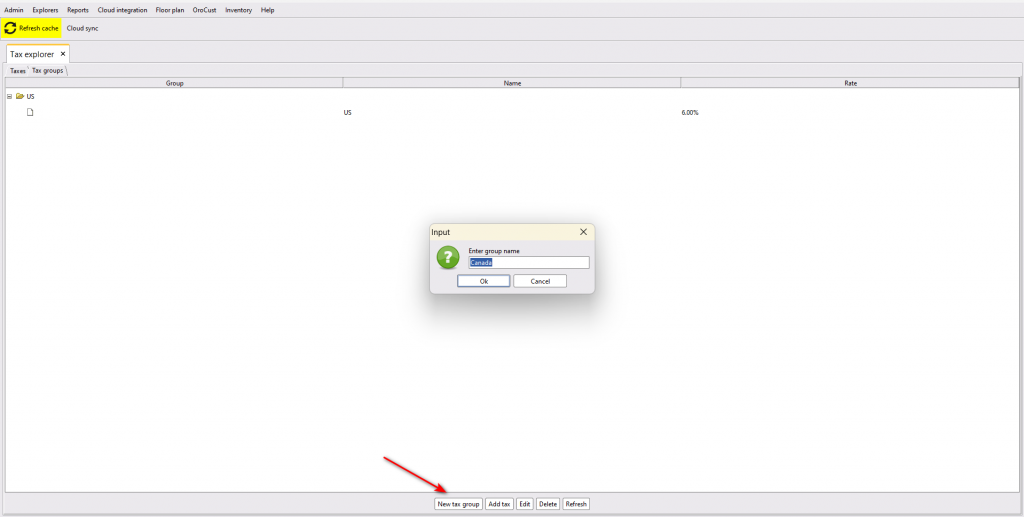
Creating new tax groups
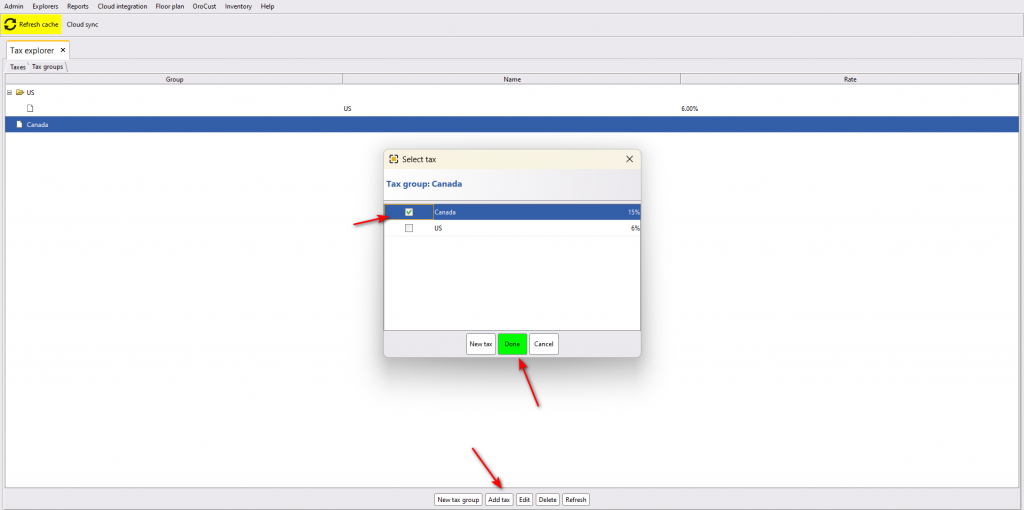
Selecting taxes for the tax groups
Setup Receipt Designer to show Tax Breakdown
Then turn on the tax breakdown option from back office–> admin–>receipt configuration–>main receipt–>select the category–>select show tax breakdown–>save

Turning on tax breakdown option
Setup Store wise Default Tax Groups
Now, if a store has menu items of only one tax group, they can select a default tax group for all the menu items. In this way, they don’t have to select the tax group for each and every menu item. To set this, go to back-office–>store configuration–>charges–>select a default tax group from the drop-down option–>press ok to save.
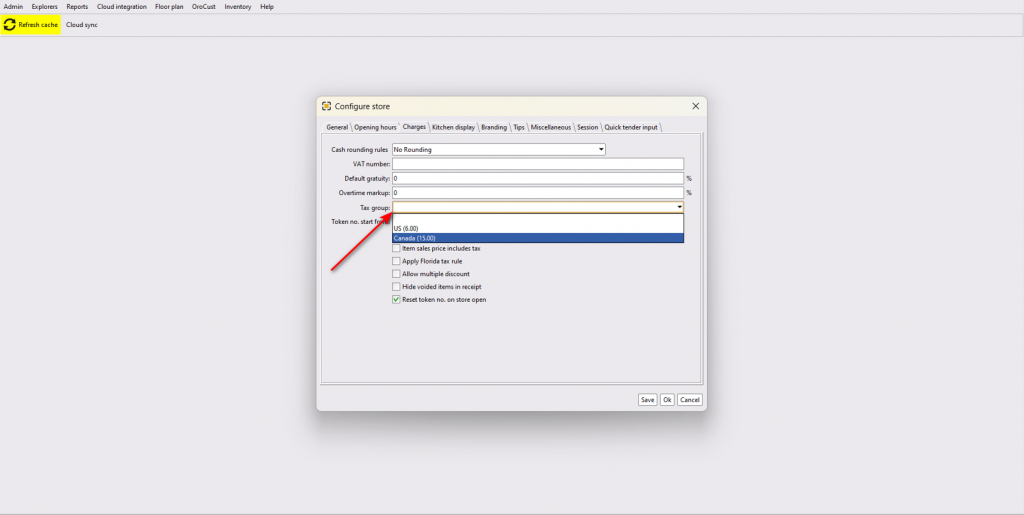
Selecting default tax group
Setup Tax Group in Menu Item
But, if a store has some menu items of different tax groups, they have to select each and every menu items and select the tax group for those menu items.
back office–>explorer–>menus and others –>menu items–> select a menu item–>edit item–>change tax group from the drop-down list–>press ok to save
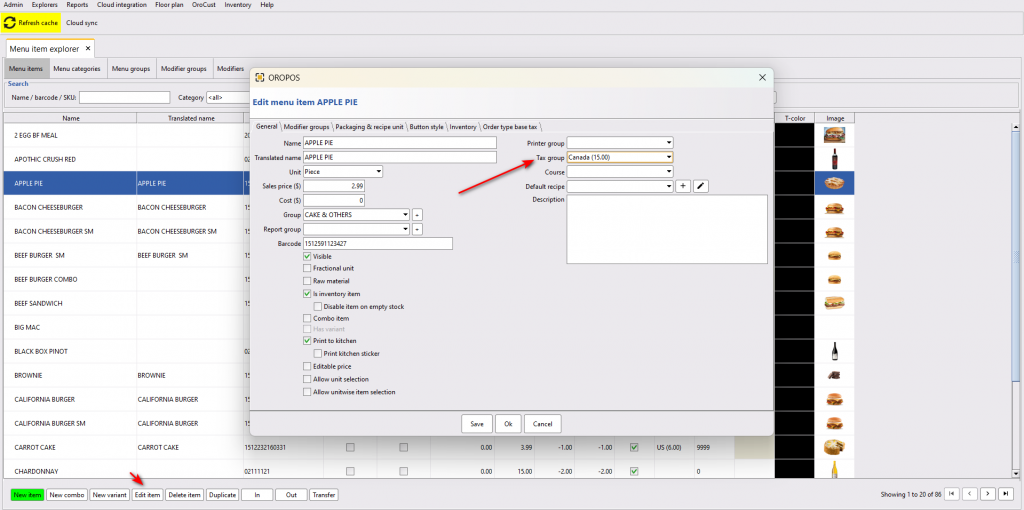
Selecting tax group for each menu items
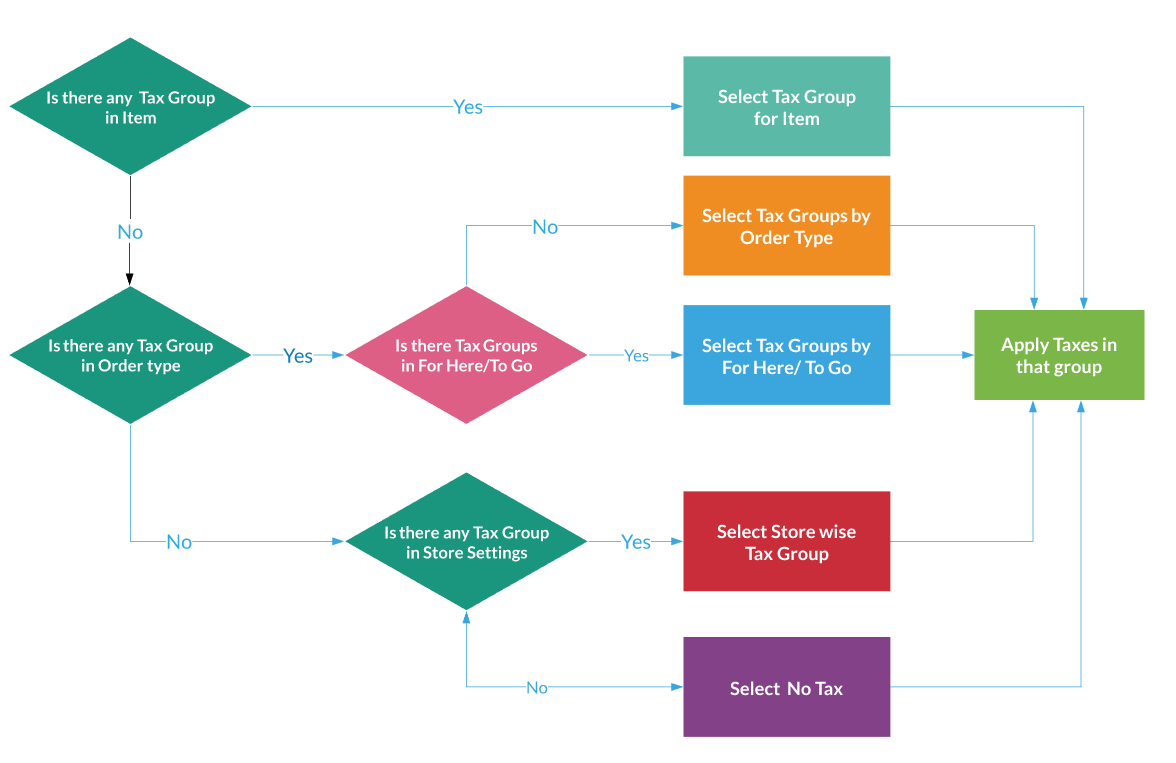
Tax calculation flow chart
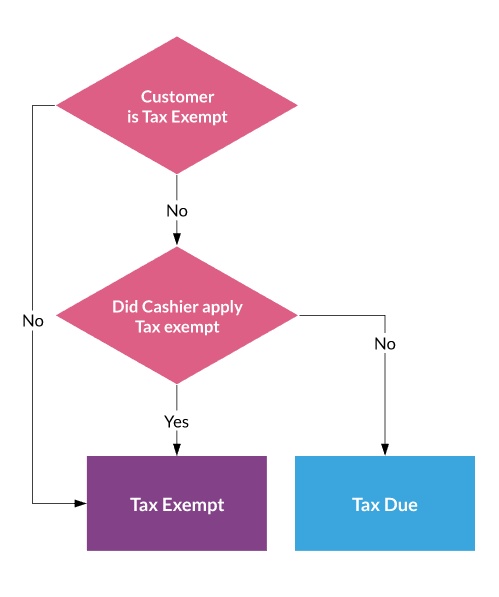
Tax exempt flow chart
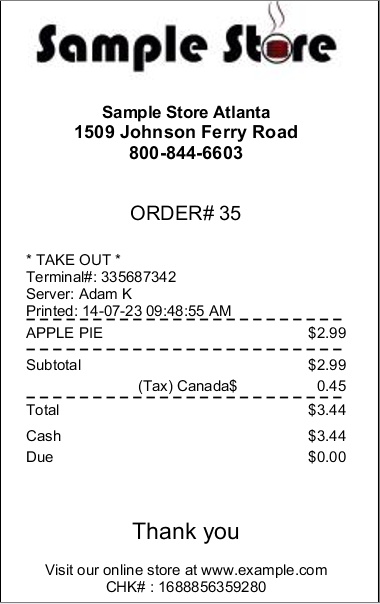
Receipt with tax breakdown