
Configuring Seat Based Order
ORO POS allows taking seat-based orders. This feature requires the Floorplan plugin. To enable seat-based order, follow the steps below.
- Arrange seats in the tables.
- Enable seat-based order in the order type.
- Take a seat-based order.
- Split the order by seat.
Arrange seats in the tables
Back office–> floorplan–> tables–> select a table and edit it–> now click on the capacity of your choice
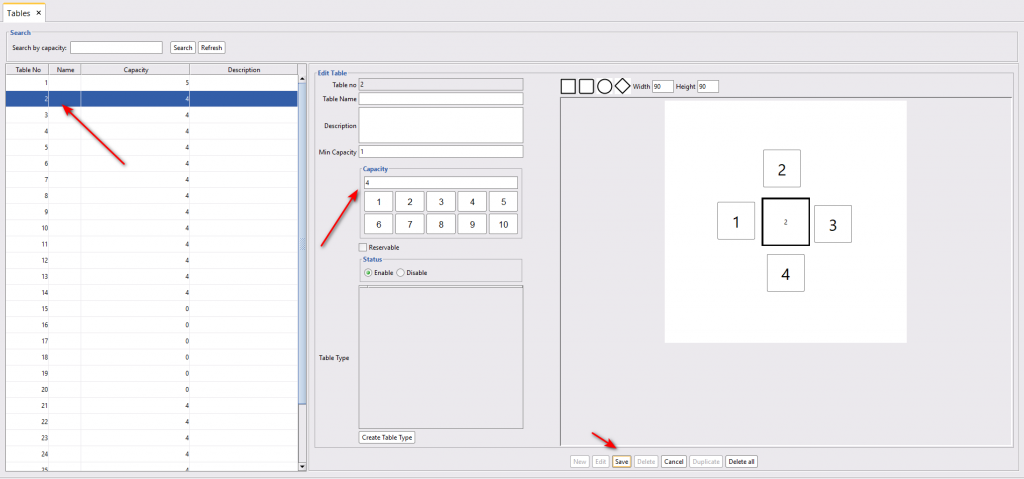
- Select the table.
- Click on “Edit” to add seats.
- Enter minimum capacity. Please put minimum capacity at least 1 to save the change.
- Click on the capacity number. After you click here, the seats will appear to the right side with the table.
- Select the table type.
- Rearrange the seats of your choice. Just drag and drop it anywhere you like surrounding the table.
- Make the table reservable if you let the customer have the prior table reserve option.
- Enable the settings.
- Finally, save the changes.
Taking Order In Seats
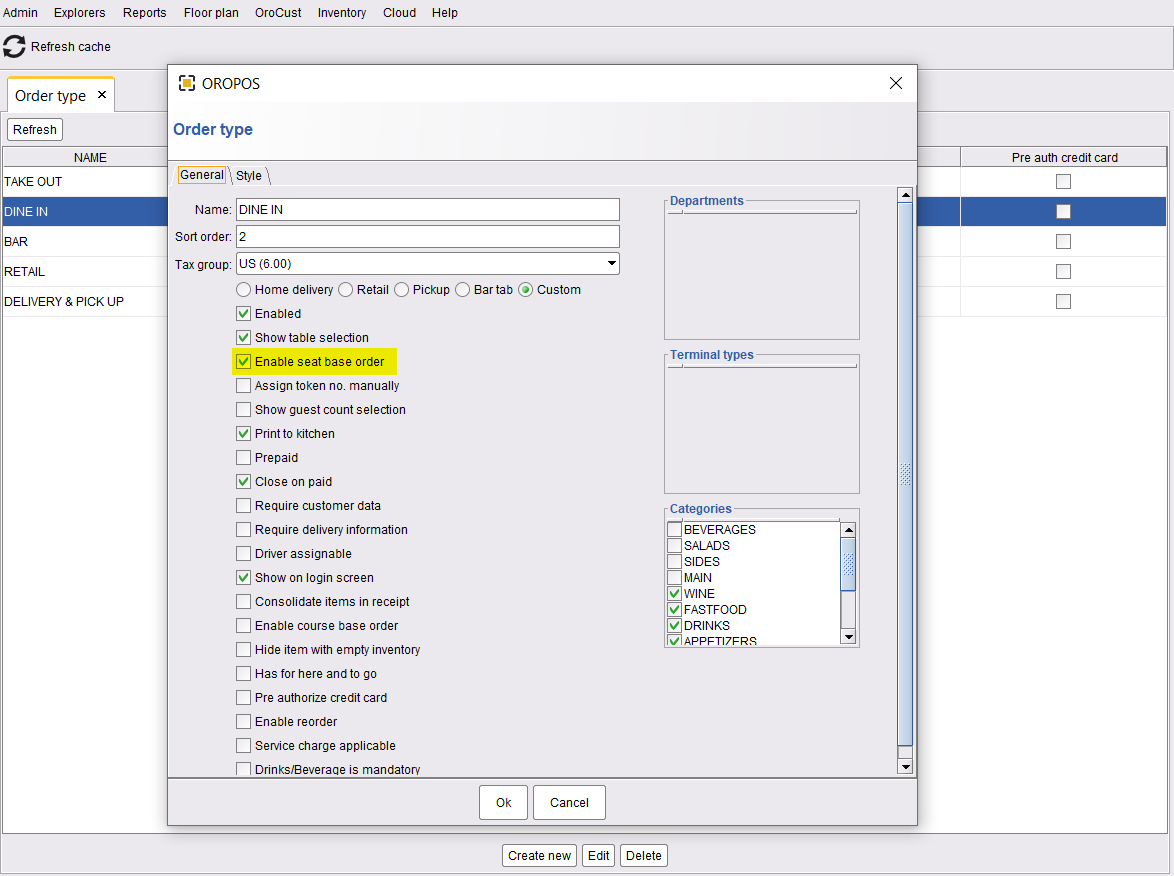
Enable seat-based order option of an order type before taking the seat-based order. To enable it, go to back-office–> admin–> order type–>enable seat-based order
Now stores can take seat-based order following the steps below,
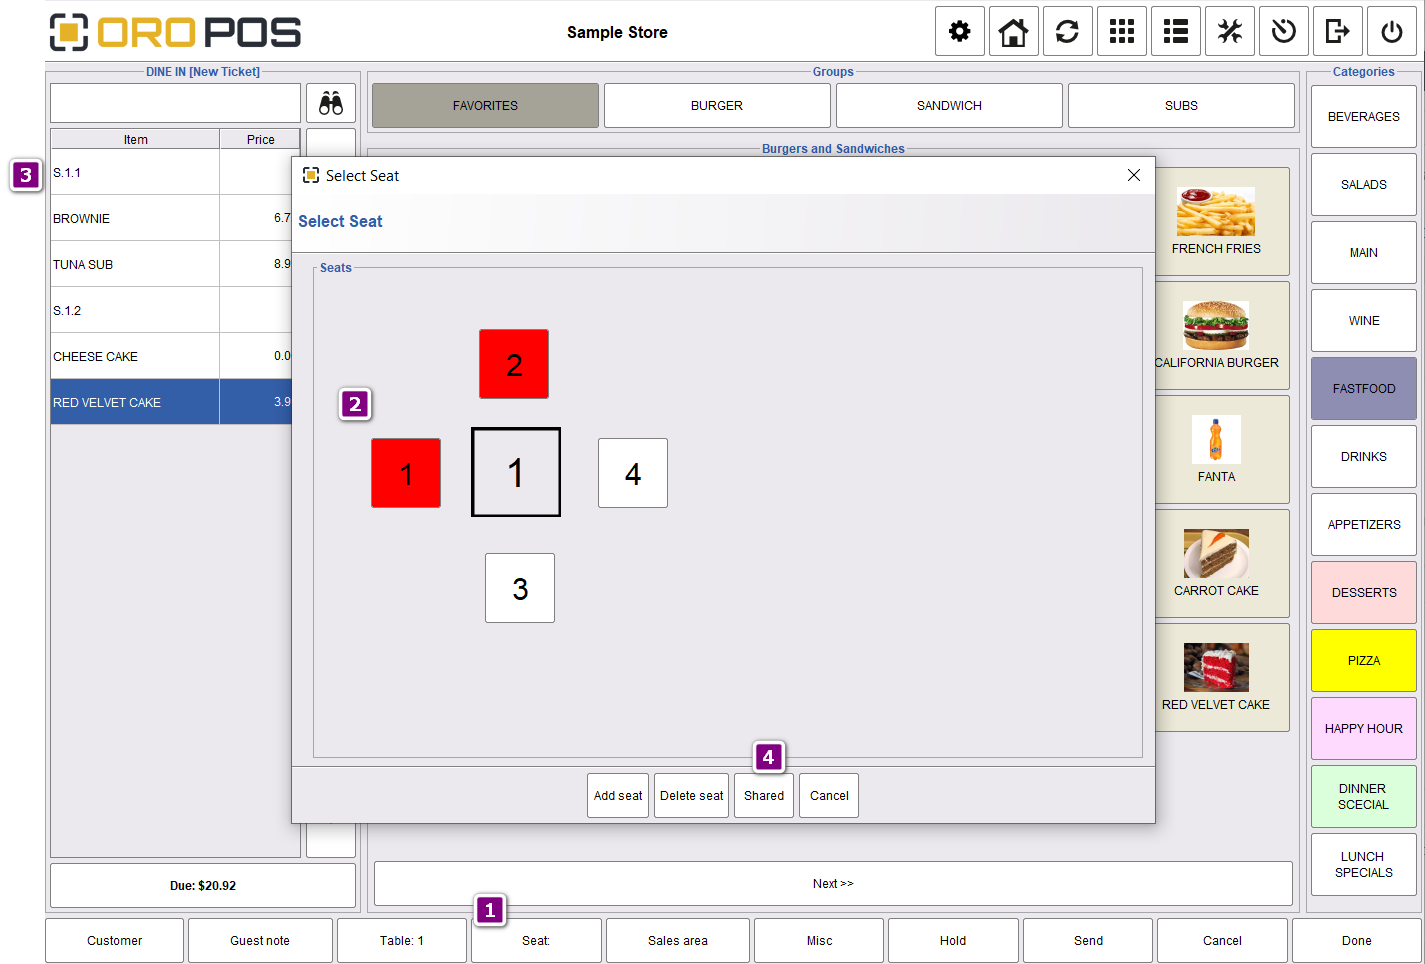
- After choosing the table select seat.
- Choose seats from this box.
- Menu items assigned for seats.
Here seat naming convention is S<table number>.<seat number>. This helps to remember the seats even when you take orders in table group.
- This button is used to share the menu items among multiple seats. For example, if guests in the table want to share a large bowl of soup, they can mark it shared.