
Kitchen Display Systems (KDS) simplify kitchen communication and processes, increasing kitchen efficiency, reducing errors, and enhancing food quality and speed of service.
KDS Concept

A store can choose one of the two types of hardware for a KDS, a separate touchscreen terminal, or regular terminal with bump bar. As shown in screenshot 1.2, based on the size of the monitor, KDS can show 4 to 8 kitchen tickets at a time.
When the server rings an order, the order is electronically sent to the respective KDS.(7). KDS blinks the refresh button and Chefs then loads kitchen ticket in the screen. When food is prepared Chefs would press the bump button and release it. Every ticket has a timer at the top, it shows how much time has been elapsed. Based on time out settings that changes its color (3),(4),(5). Although Bumping a ticket is more common, some stores can let bump each item (2).
A store can also set another touchscreen monitor as Dispatch monitor. That helps the server to see which orders are ready to be served. (10). In the same manner, when a server picks up an item from the kitchen she presses Dispatch button and mark as done (10),(11).
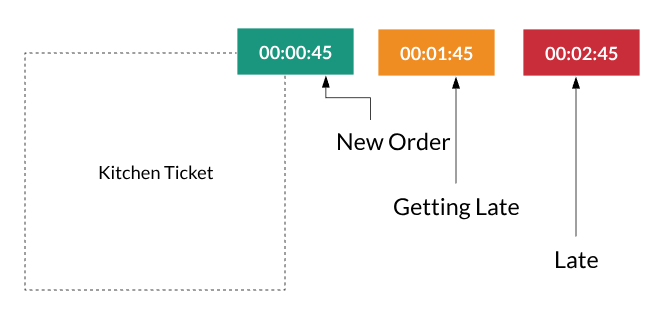
1.1 KDS Time out
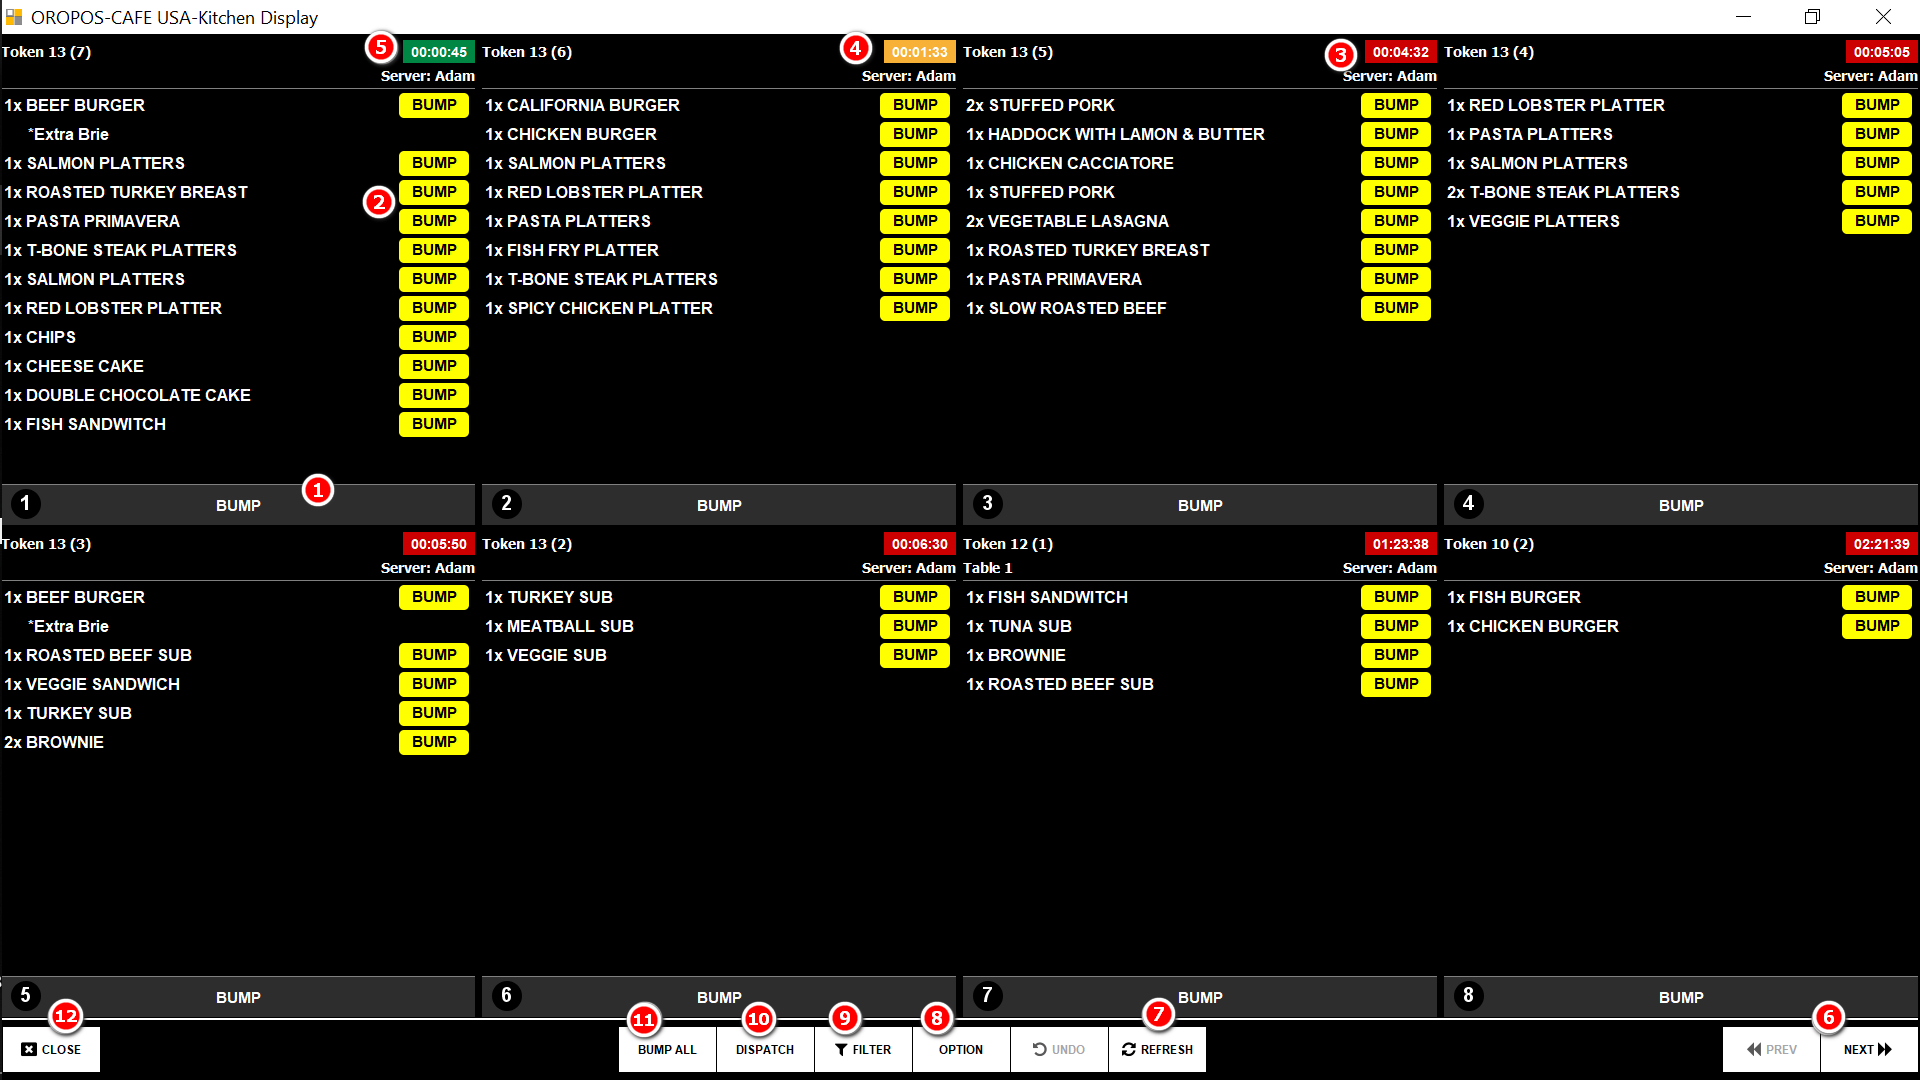
1.2 KDS Window
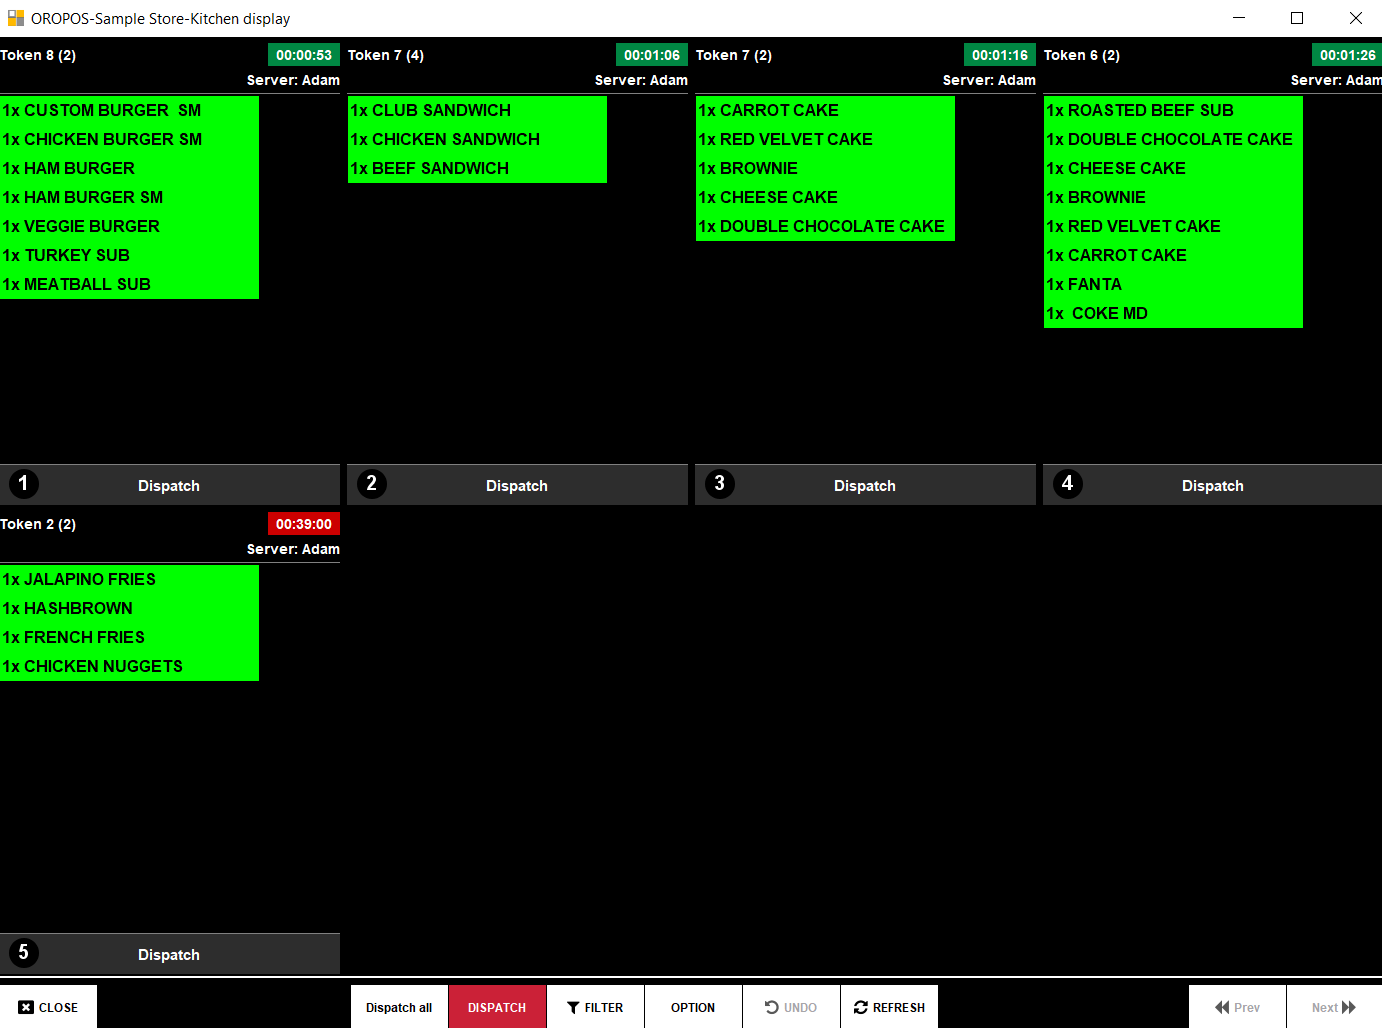
1.3 Dispatch Window
KDS options
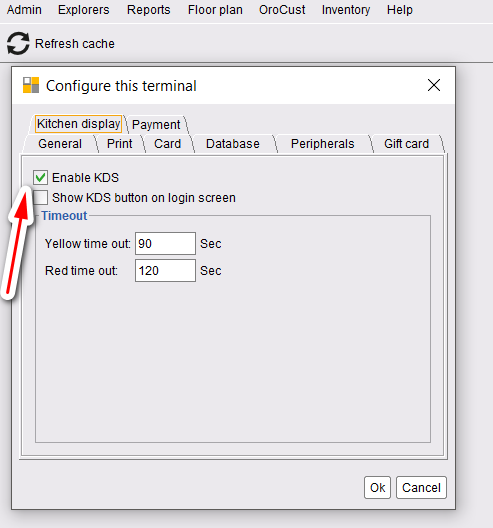
This configuration dialog can set the display style, color, timeouts, and tickets per page(7).
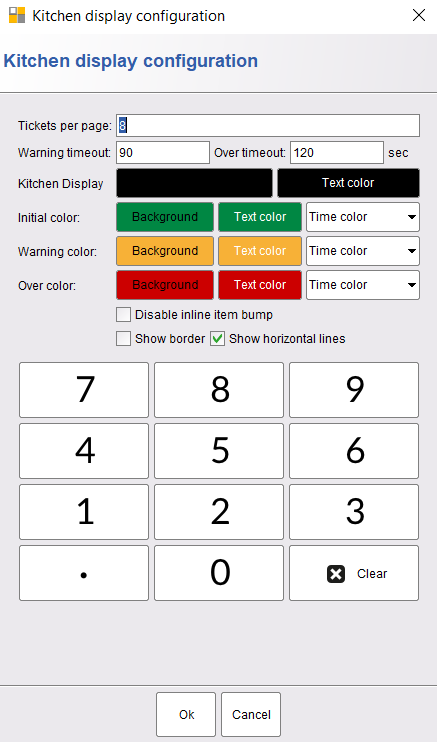
1.4 Option
Filter

From this window, Manager’s can filter tickets based on the kitchen printers and the order types (9).
1.5 Filter
Enable KDS
Go to back-office–>admin–>terminal Configuration–>kitchen display–>enable kds option–>press ok to save the change and restart the POS.
1.5
Accessing KDS Screen
There are two ways to access the KDS. If configured in the back office, a manager can log in and find the KDS screen through the log-in screen.
1.6
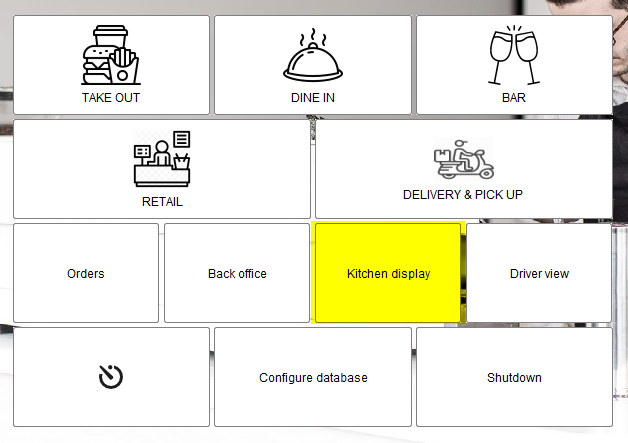
Or, from any order type, press the following buttons and KDS will start running.

1.7
1.8
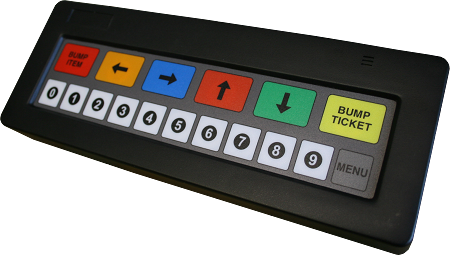
Configuring KDS with bump bar
ORO POS supports a USB bump bar. The bump bar acts as a keyboard. Chefs can select a ticket by pressing the ticket number and then pressing Bump Ticket.
1.9
Updates in v1.5
All screenshots and features described are for ORO POS 1.4. The following section describes some changes in ORO POS 1.5
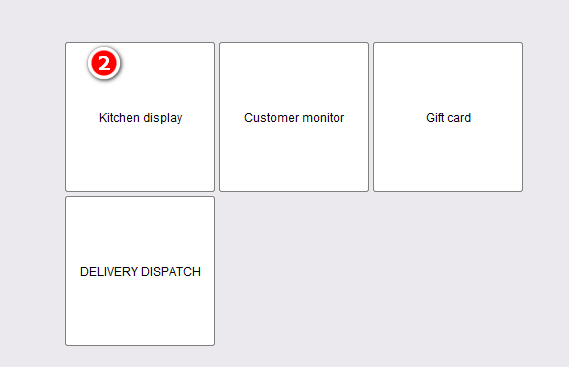
Added ‘Dispatch view’ button in Extra functionalities dialog.

Added the ‘Dispatch view’ button on the login screen.

Added ‘item text size’ & ‘ticket text size’ field in the kitchen display configuration. Item text size determines the text size of ticket items. Ticket text size determines the text size of ticket properties (eg. Token#, Table#, etc.)